Autumn -- yes this cherished time of year has finally arrived along with all the lovely things we come to cherish after a long summer...from cool nights and warm cider, to the howl of a brisk breeze under the moonlight. This season can bring out the best inspiration from us all! The joy of crafting and the love of creating a little magic with rich, Italian crepe paper is something we continue to enjoy sharing with you, and today we are pleased to present our first Carte Fini blog post with our much anticipated "Featured Artist" showcase!
We are launching the Featured Artist showcase with an extremely talented, versatile, and beautiful individual (inside and out)! Please meet Tiffanie Turner, along with her story and a fabulous tutorial she has created just for you! Check it out, and we hope you'll "Fall" for Tiffanie's stylish, and very chic spin on floral fun.
Check us out again next month for more of Tiffanie's wonderful creations and inspiration. Happy Fall, and happy crafting!

Hello there! My name is Tiffanie Turner and I am an architect, mother, performer and artist based in San Francisco. I discovered Carte Fini's amazing floral crepe papers just last year and they have literally changed my life. Since then I have used this gorgeous crepe paper in so many different ways that I decided to start my new business, papel SF, so I can sell all of the beautiful things I have been making. I am obsessed with the paper and it is currently my favorite medium. You can find many more of my crepe paper tutorials at my blog, corner blog.

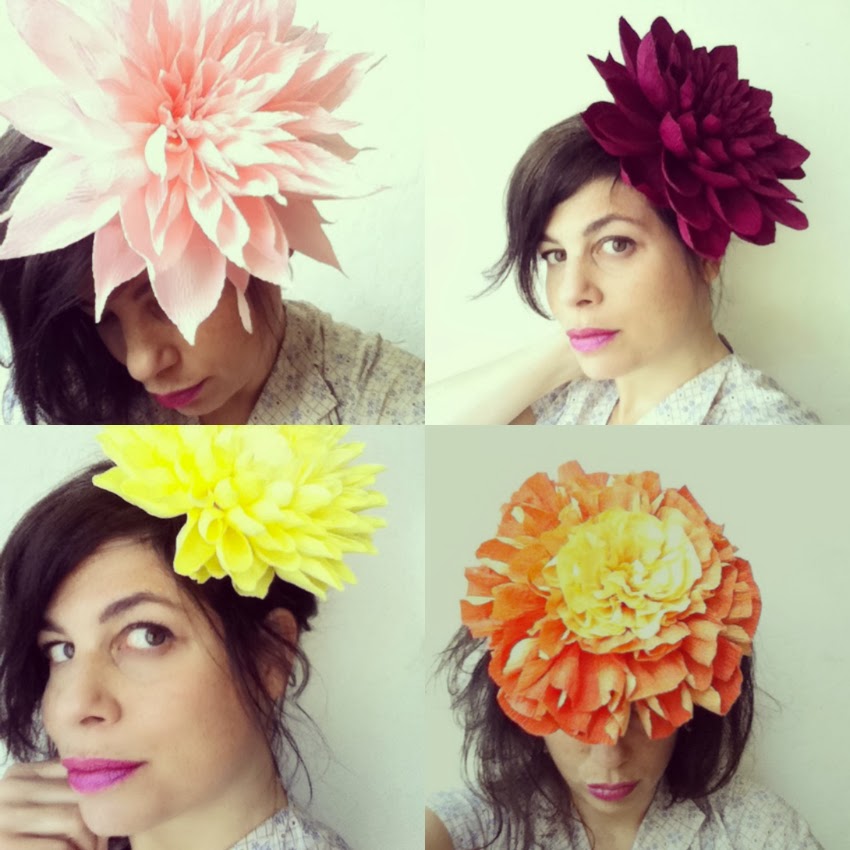
I'm so excited to be Carte Fini's featured artist for the next three months. I'm going to be showing you some interesting and seasonal projects to make using floral crepe paper. This month it's fall flower headpieces. Beautiful giant dahlias and marigolds to wear in your hair. They are so fun!

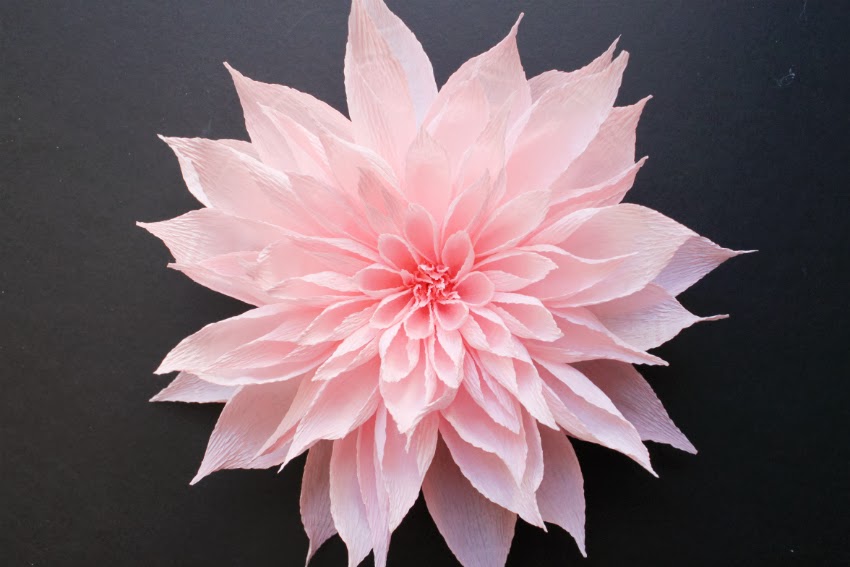
This tutorial is for the (light pink) dahlia with the pointy petals, but it can be adapted very easily to make any one of the flowers shown here. Let's get started!
Carte Fini floral crepe paper in desired colors (about a quarter roll per flower), hot glue gun and glue sticks, scissors and a circular base plate. The base plate can either be cut from cardboard or from the end of a paper mâché balloon. Paper mâché is my preference as it is stiffer and I have tons of it around left over from these. You will also need felt to line the bottom of the base, and fabric covered elastic headbands which you can find at the drug store.

My favorite colors for dahlias and marigolds (shown here from top to bottom): 548, 584, 572, 576/9 and 574).
Begin by preparing your base. If using cardboard, cut out a 3 1/2" diameter circle, cut a slit to the center as shown below, and overlap the cut edges, glueing to secure. This creates a concave side that will contour nicely to your head.

Or as I mentioned above, you can use the end of a paper mâché balloon. Cover any holes with crepe paper (stretch the paper out and coat well with glue). Find the center point, or peak, of the end of the balloon shape and measure down 1 3/4" from that point all the way around, so that you end up cutting out a convex disk about 3 1/2" in diameter.

Cover all inside and outside surfaces of the base with (stretched) crepe paper, making sure there is glue on much of the paper. After both sides are covered with paper, glue a strip of paper around the rim to finish it.

Now you're ready to start the center of the dahlia. Cut a strip of paper about 2 1/2" wide by 1" tall. Fold the strip over on itself twice, then cut wedges out of the sides of the strip as shown so you are left with four attached triangles.

Do this again but with a strip that is twice as long as the first one. Starting with the shorter strip, fold each triangle in half and set with a dab of glue so you have a bit of a star-shaped cluster of triangles. Glue to the very top of your headpiece base.
Fold and glue the first four triangles of the longer strip in the same manner, then glue that cluster tightly near the first cluster. Take the remaining four triangles that are trailing behind and glue them in and out of the center triangles, making a sort of chaotic middle for your dahlia.
Next come the petals. The types of petals are numbered below and are set on a 1" x 1" grid for scale. You can cut them ahead of time or as you go along, so you can check the shape and size of your dahlia along the way.
Always run the grain of the paper the long way, or up and down the page as shown below.

Stretch the center of each TYPE 1 petal so that it is nicely cupped. Add a long bead of hot glue at the bottom 3/4" or so of the inside of a petal, then slowly roll the end with the glue between your hands without crushing the petal until the glue cools off. Bend the end on the edge of a counter back about 3/8". Glue all eight petals snugly to the center petals, spacing evenly to create that orderly petal configuration dahlias are known for.


Follow TYPE 1 instructions above for stretching and glueing all 16 TYPE 2 petals. Crease the first eight back about 7/8" from the ends and then hot glue into the areas between the TYPE 1 petals


Crease the second eight back 3/4" from the ends and glue in between the first eight TYPE 2 petals. It will really start looking like a dahlia at that point.
 TYPE 3 (16 petals):
Stretch all 16 TYPE 3 petals as shown below (cupping a little further down the petal). Glue and roll the ends, then crease the first eight back about 7/8" from the ends and hot glue them into the spaces between the TYPE 2 petals.

The remaining eight TYPE 3 petals should not be glued and rolled, but instead just folded back about 3/8" from the ends as shown, and glued into the spaces between the first set of TYPE 3 petals.

Glue and roll the first eight TYPE 4 petals, bend the ends back around 7/8" from the ends, and glue into place in between the flower petals as you have done previously. The remaining 16 TYPE 4 petals should not be glued and rolled, but instead just folded back about 1/2" from the end. Glue those into place (eight petals per row for two rows) as you have the others.


Your flower should be looking nice and full at this point. Now it's a matter of filling in naturally below the bloom so there are no gaps between the petals and the base of the headpiece.
Stretch these petals to cup them, but also stretch the bases a bit so you can get a lot of coverage with them. Apply glue to the back of the base of each petal and adhere to the base of the headpiece, again evenly spacing them between the petals above.

These are the infill petals to go between the TYPE 5 petals. Taper their bases as needed to fit and glue into place. If any petals get wrinkled or deformed in the process, it's easy to just smooth them back into shape with your fingers.

Now for the headband. It's important as you'll see in these photos that the elastic headband is only attached at one point to the headpiece. The rest of it needs to be able to stretch or you'll never get it to fit around an adult head.
Start by tracing a circle in whatever color felt you desire. A circle just a little bigger than the rim of a pint class is perfect for this particular base. Cut a slit from a point on the edge to the center.
Apply a dime-sized pool of hot glue to the center of the back of the base. Using another glue stick, press the headband into the glue so it is well embedded (this is where I hid the metal connector that came on my headbands). Next, apply a thick line of glue along one side of the headband. You are going to create a channel that has no glue in it so the headband can keep stretching, so be sure no glue makes its way onto it.

Press the cut edge of the felt down on the bead of glue firmly until the glue cools. Then spread more glue all over that half of the headpiece base until just before it reaches the headband. Press that half of the felt down into the glue until set. Now set a bead of glue down on the other side of the headband and press down on the felt. There should be no glue over or under the headband, just to either side at this point. Finally, fill the rest of the base in with glue until just before the last segment of headband and affix the felt. Glue the extra triangular flap down where it lays naturally. Wait a second or two for the glue to set completely, then pop it on your head and you're ready to go!


To make the marigold or the yellow or deep maroon dahlias in the photos at the top of the post, use these petal variations, scaling as required. The skinny petals require a MUCH smaller base, by the way. The base on that yellow dahlia is less than 1 1/2" in diameter!

Again, this grid is 1" x 1" and these petals are just to show basic shapes
I love seeing the results of my tutorials, and I know the great people at Carte Fini do, too. If you make one of these, please let us know, we'd really love to see it and maybe share it as well. See you next month for another fun project!

Disclaimer:
This tutorial should not be used for any commercial purpose. We appreciate your understanding.


Carte Fini
Author